Setting up a home server using Debian
In this post, I’ll be setting up a Debian server with Docker and even setting up ability to create and manage Virtual Machines and Linux Containers. I’m using a Ryzen mini PC with 1 nvme SSD and 1 SATA SSD. I’ll also show how to setup a network share for the SATA SSD.
Initial setup
The first thing I install in every debian install is unattended-upgrades package that takes care of installing security updates without having to do so manually. Setting it up is as easy as running the following command.
1
sudo apt install -y unattended-upgrades
After a fresh install of Debian, I’ll need to modify the /etc/network/interfaces file to the following.
1
2
3
4
5
6
7
8
9
10
11
12
13
14
15
16
17
18
# This file describes the network interfaces available on your system
# and how to activate them. For more information, see interfaces(5).

source /etc/network/interfaces.d/*

# The loopback network interface
auto lo
iface lo inet loopback

# Wifi
auto wlp3s0
iface wlp3s0 inet manual

# The primary network interface
allow-hotplug enp4s0
iface enp4s0 inet static
        address 192.168.1.100/24
        gateway 192.168.1.1
This disconnects the Wifi and sets a static address to the ethernet connection.
Also we need to make the following changes to /etc/resolve.conf.
1
nameserver 192.168.1.1
This sets the DNS server to whatever I set on my router.
Now reboot the machine.
NAS
To setup a network share which I can access from other devices, I’ll setup a Samba share using Cockpit and some plugins from 45drives.
Install cockpit with the following commands as root. This enables backports repository and then installs cockpit from it.
1
2
3
4
5
6
. /etc/os-release
echo "deb http://deb.debian.org/debian ${VERSION_CODENAME}-backports main" > \
    /etc/apt/sources.list.d/backports.list
apt update

apt install -t ${VERSION_CODENAME}-backports cockpit
For the plugins, head on over to these links:
- https://github.com/45Drives/cockpit-navigator
- https://github.com/45Drives/cockpit-file-sharing
- https://github.com/45Drives/cockpit-identities
In each of them, go to releases page, and in the latest release, right click the .deb file and select copy link. Now in the debian terminal, download these files like this example.
1
wget https://github.com/45Drives/cockpit-identities/releases/download/v0.1.12/cockpit-identities_0.1.12-1focal_all.deb
Repeat for all 3 .deb files. Now install them using this command and then remove the .deb files after installing.
1
2
3
sudo apt install ./*.deb

rm *.deb
Now on the browser, head over to http://<ip-address>:9090 and you can login with your user account in the cockpit dashboard.
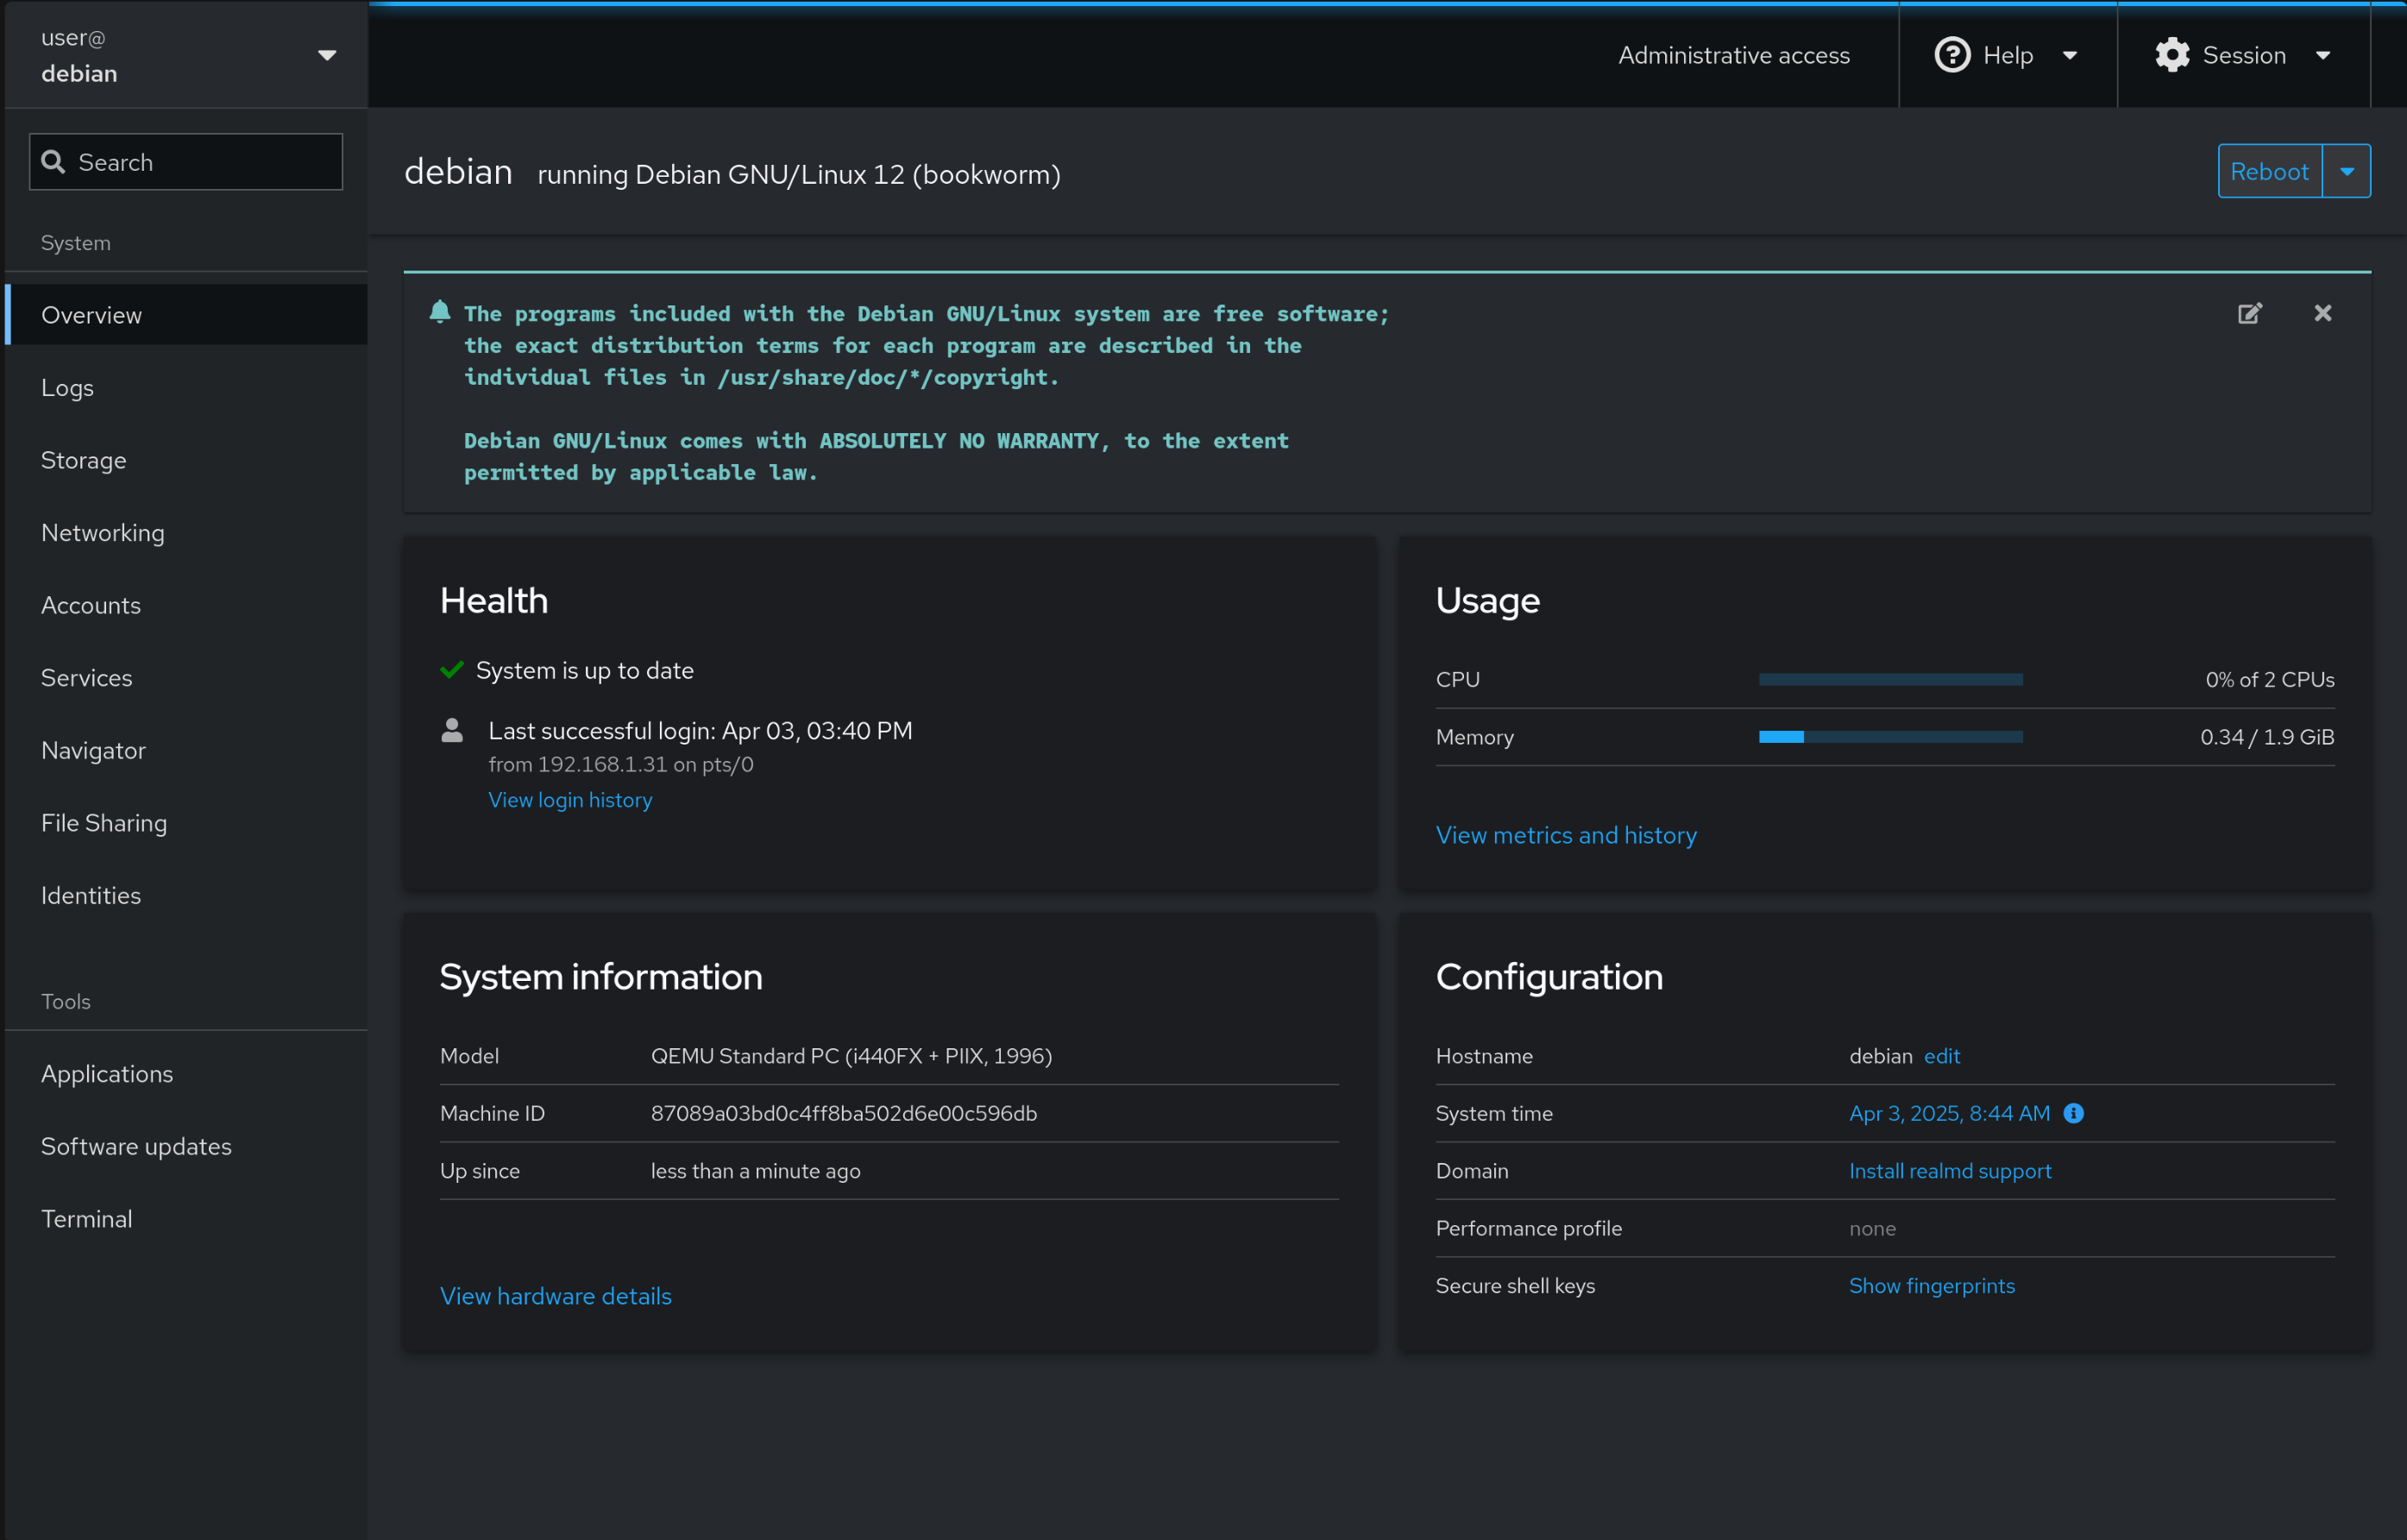
Now go to Identities, select your user, and select “Set Samba Password” to choose a Samba password used for accessing it over the network.
Now go to File Sharing, and in Share configuration, press the + button to create a new share. Give the path, and select the appropriate permissions.
This should start an SMB server which can be accessed from almost every major Operating System on the same network.
Docker
To setup all my services that will run on my home server, I’ll be using Docker. However, instead of installing it manually, I’ll be making use of CasaOS. There are a number of benefits of maintaining Docker containers through CasaOS, such as:
- One click installation of apps. No need to fiddle around with Portainer or Docker compose files.
- Ability to format our SSD for storage and setup a Samba share with the click of a button.
- A nice dashboard to access all our apps so no need to install a separate dashboard.
However, in a production environment, you should definitely use Docker compose files as they provide reproducibility which you don’t get with CasaOS or with Docker CLI commands.
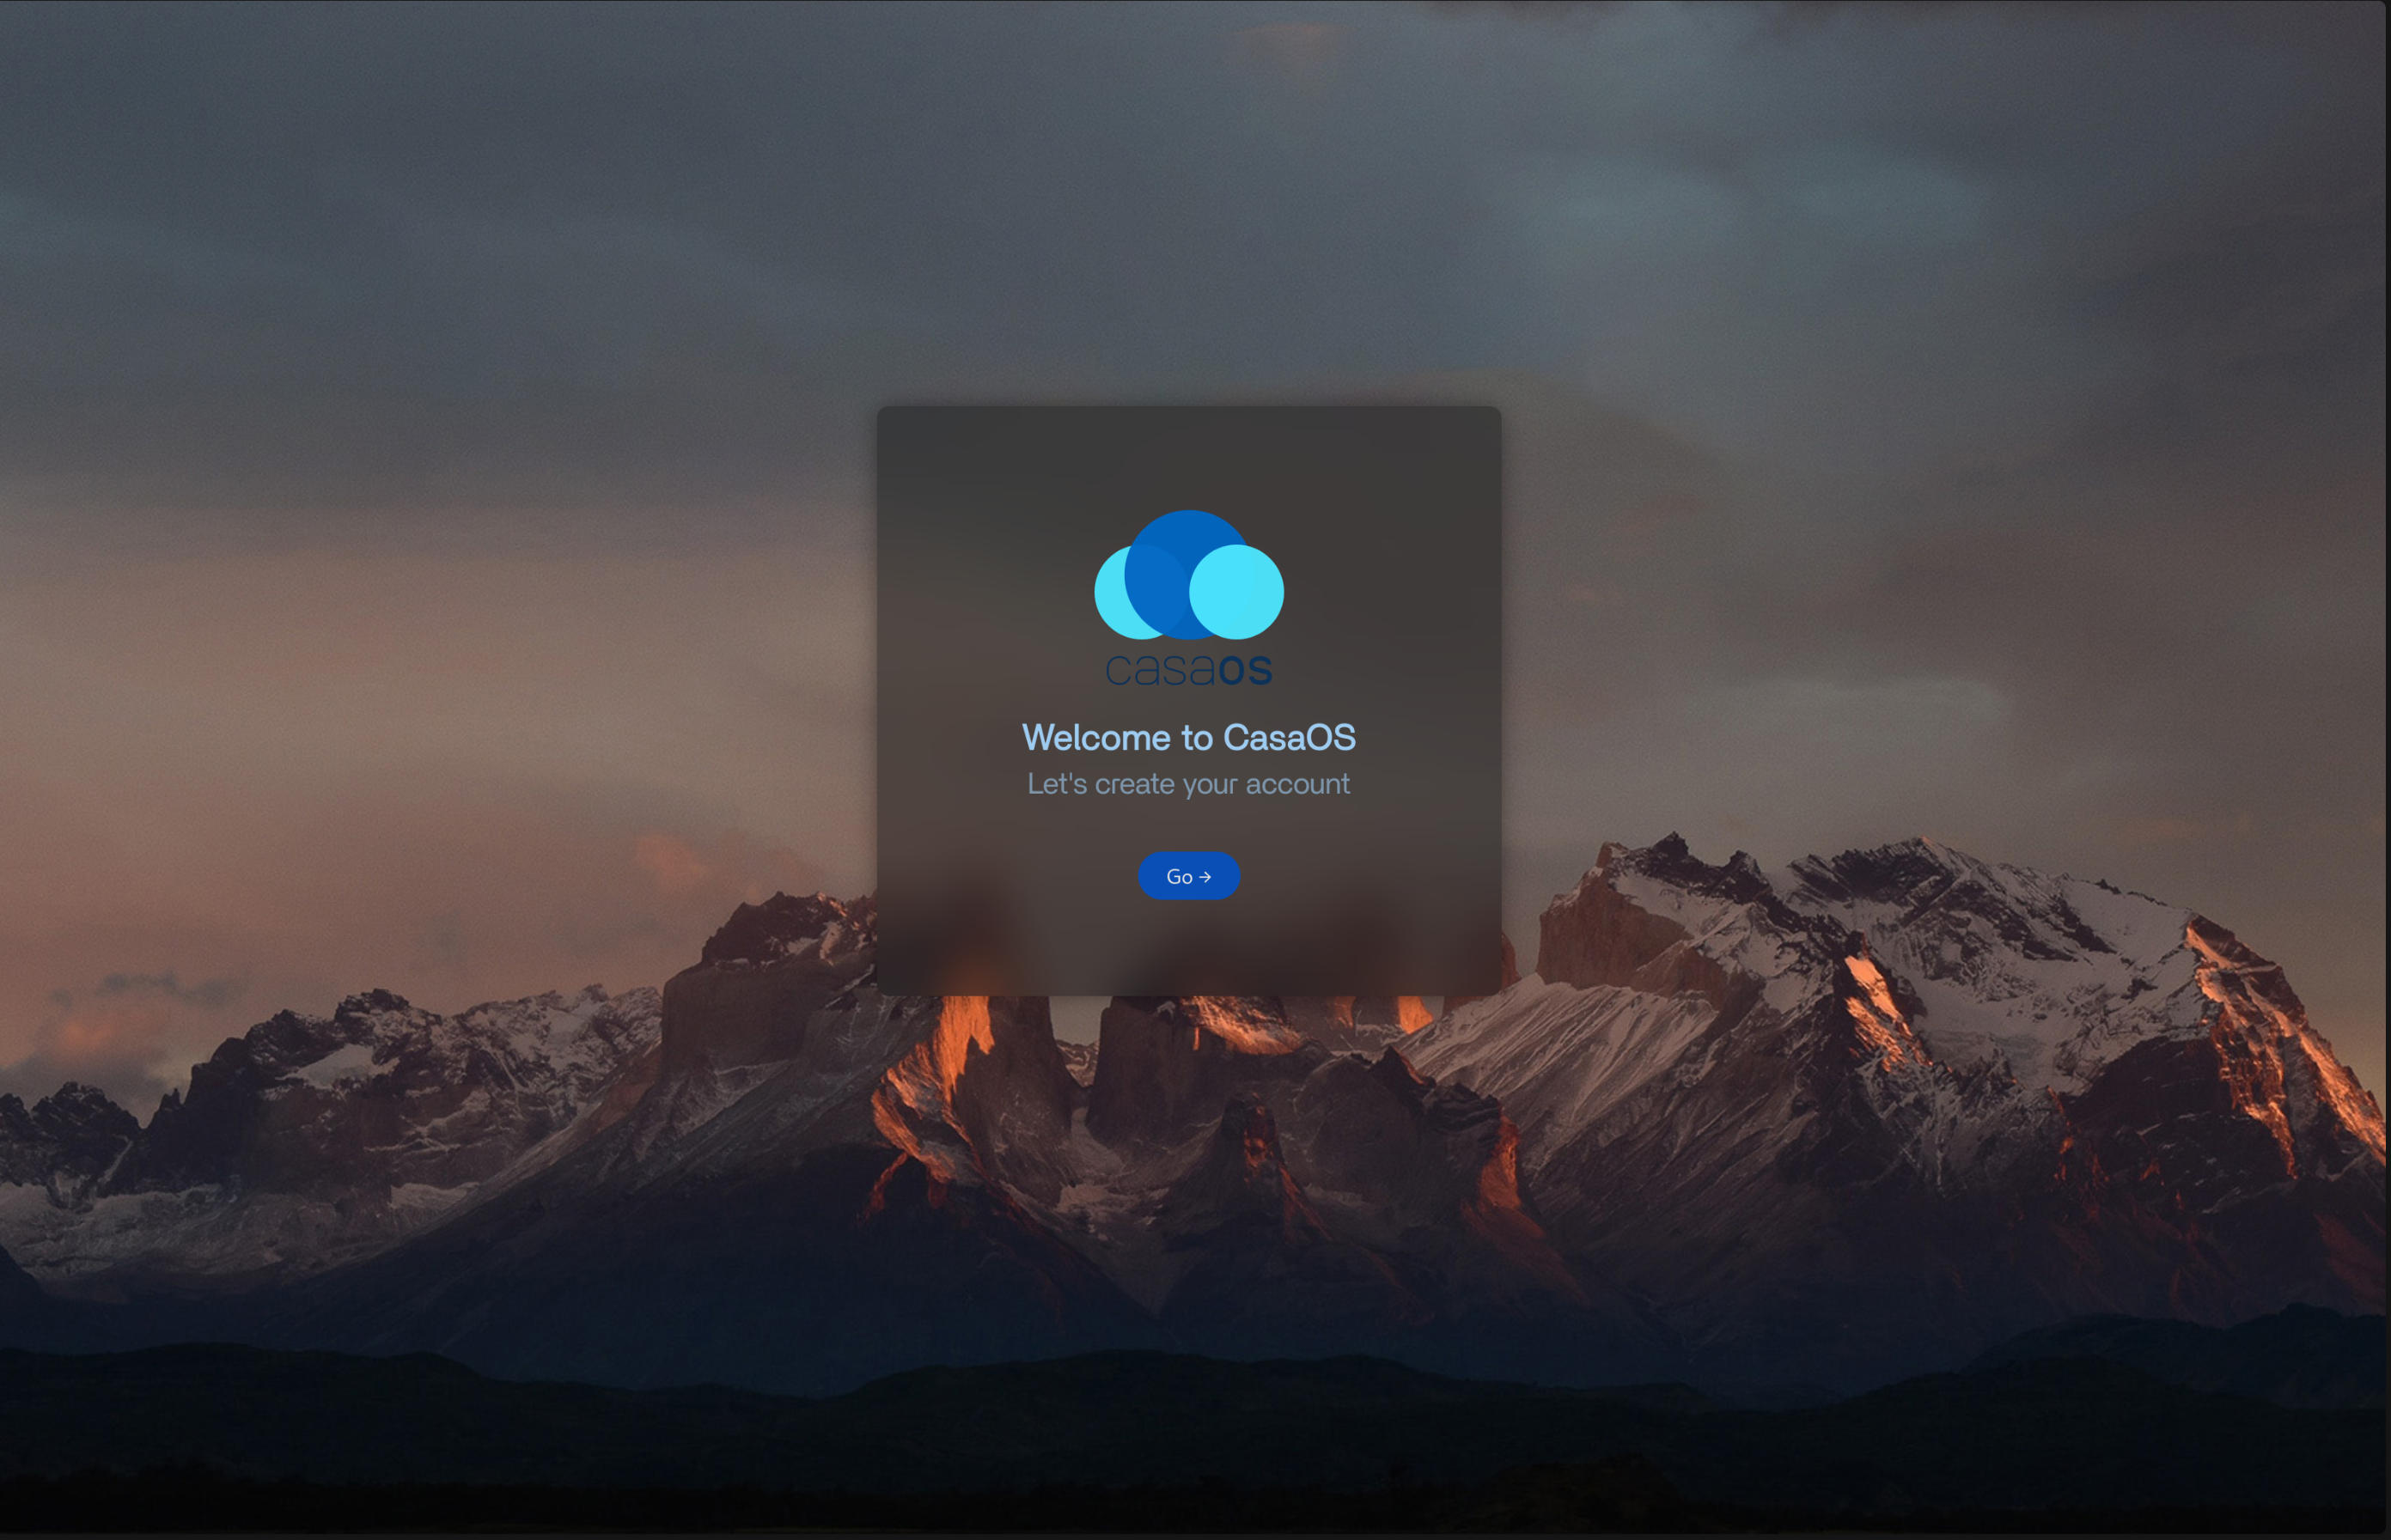
To install CasaOS, simply run the following command.
1
curl -fsSL https://get.casaos.io | sudo bash
That’s it. It’s as easy as that. After installation, you can visit http://<server-ip-address> and you’ll be presented with the CasaOS UI.
Incus
Since I did not install Proxmox, what if I want an easy to use WebGUI for creating and maintaining VMs and LXCs? Introducing Incus. It is a community driven alternative to Canonical’s LXD, an all-in-one solution for creating and maintaining Virtual Machines and LXCs. This gives us a nice WebUI similar to Proxmox without the extra features I might not use.
I’ll be using the incus builds provided by Zabbly as they provide builds for Debian 12 as well as a WebUI, which is a fork of Canonical’s LXD WebUI. Switch to being a root user.
1
sudo su
Now run the following commands as a root user.
1
2
3
4
5
wget -q -O - https://pkgs.zabbly.com/key.asc | gpg --show-keys --fingerprint
# Output should contain fingerprint matching the fingerprint on the github page's instructions

mkdir -p /etc/apt/keyrings/
wget -O /etc/apt/keyrings/zabbly.asc https://pkgs.zabbly.com/key.asc
I’ll be installing the 6.0 LTS version.
1
2
3
4
5
6
7
8
9
10
sh -c 'cat <<EOF > /etc/apt/sources.list.d/zabbly-incus-lts-6.0.sources
Enabled: yes
Types: deb
URIs: https://pkgs.zabbly.com/incus/lts-6.0
Suites: $(. /etc/os-release && echo ${VERSION_CODENAME})
Components: main
Architectures: $(dpkg --print-architecture)
Signed-By: /etc/apt/keyrings/zabbly.asc

EOF'
Now install the incus and GUI packages.
1
2
3
apt update
apt install incus incus-ui-canonical -y
incus admin init
You’ll be presented with a bunch of options to setup the incus admin. Just press Enter to choose the default in all of them, except in the question, “Would you like the server to be available over the network?”, in which choose yes. Now navigate to https://<server-ip-address>:8443 and you’ll need to generate certificate to access the WebUI.
Click the “Create a new certificate” button. On the next page, click Generate to generate a certificate. Optionally add a password as well. Download the .crt file and send it to your server via scp, then run this command on the server.
1
incus config trust add-certificate incus-ui.crt
Now back in the web interface, download the pfx file and follow the instructions to add it to your browser.
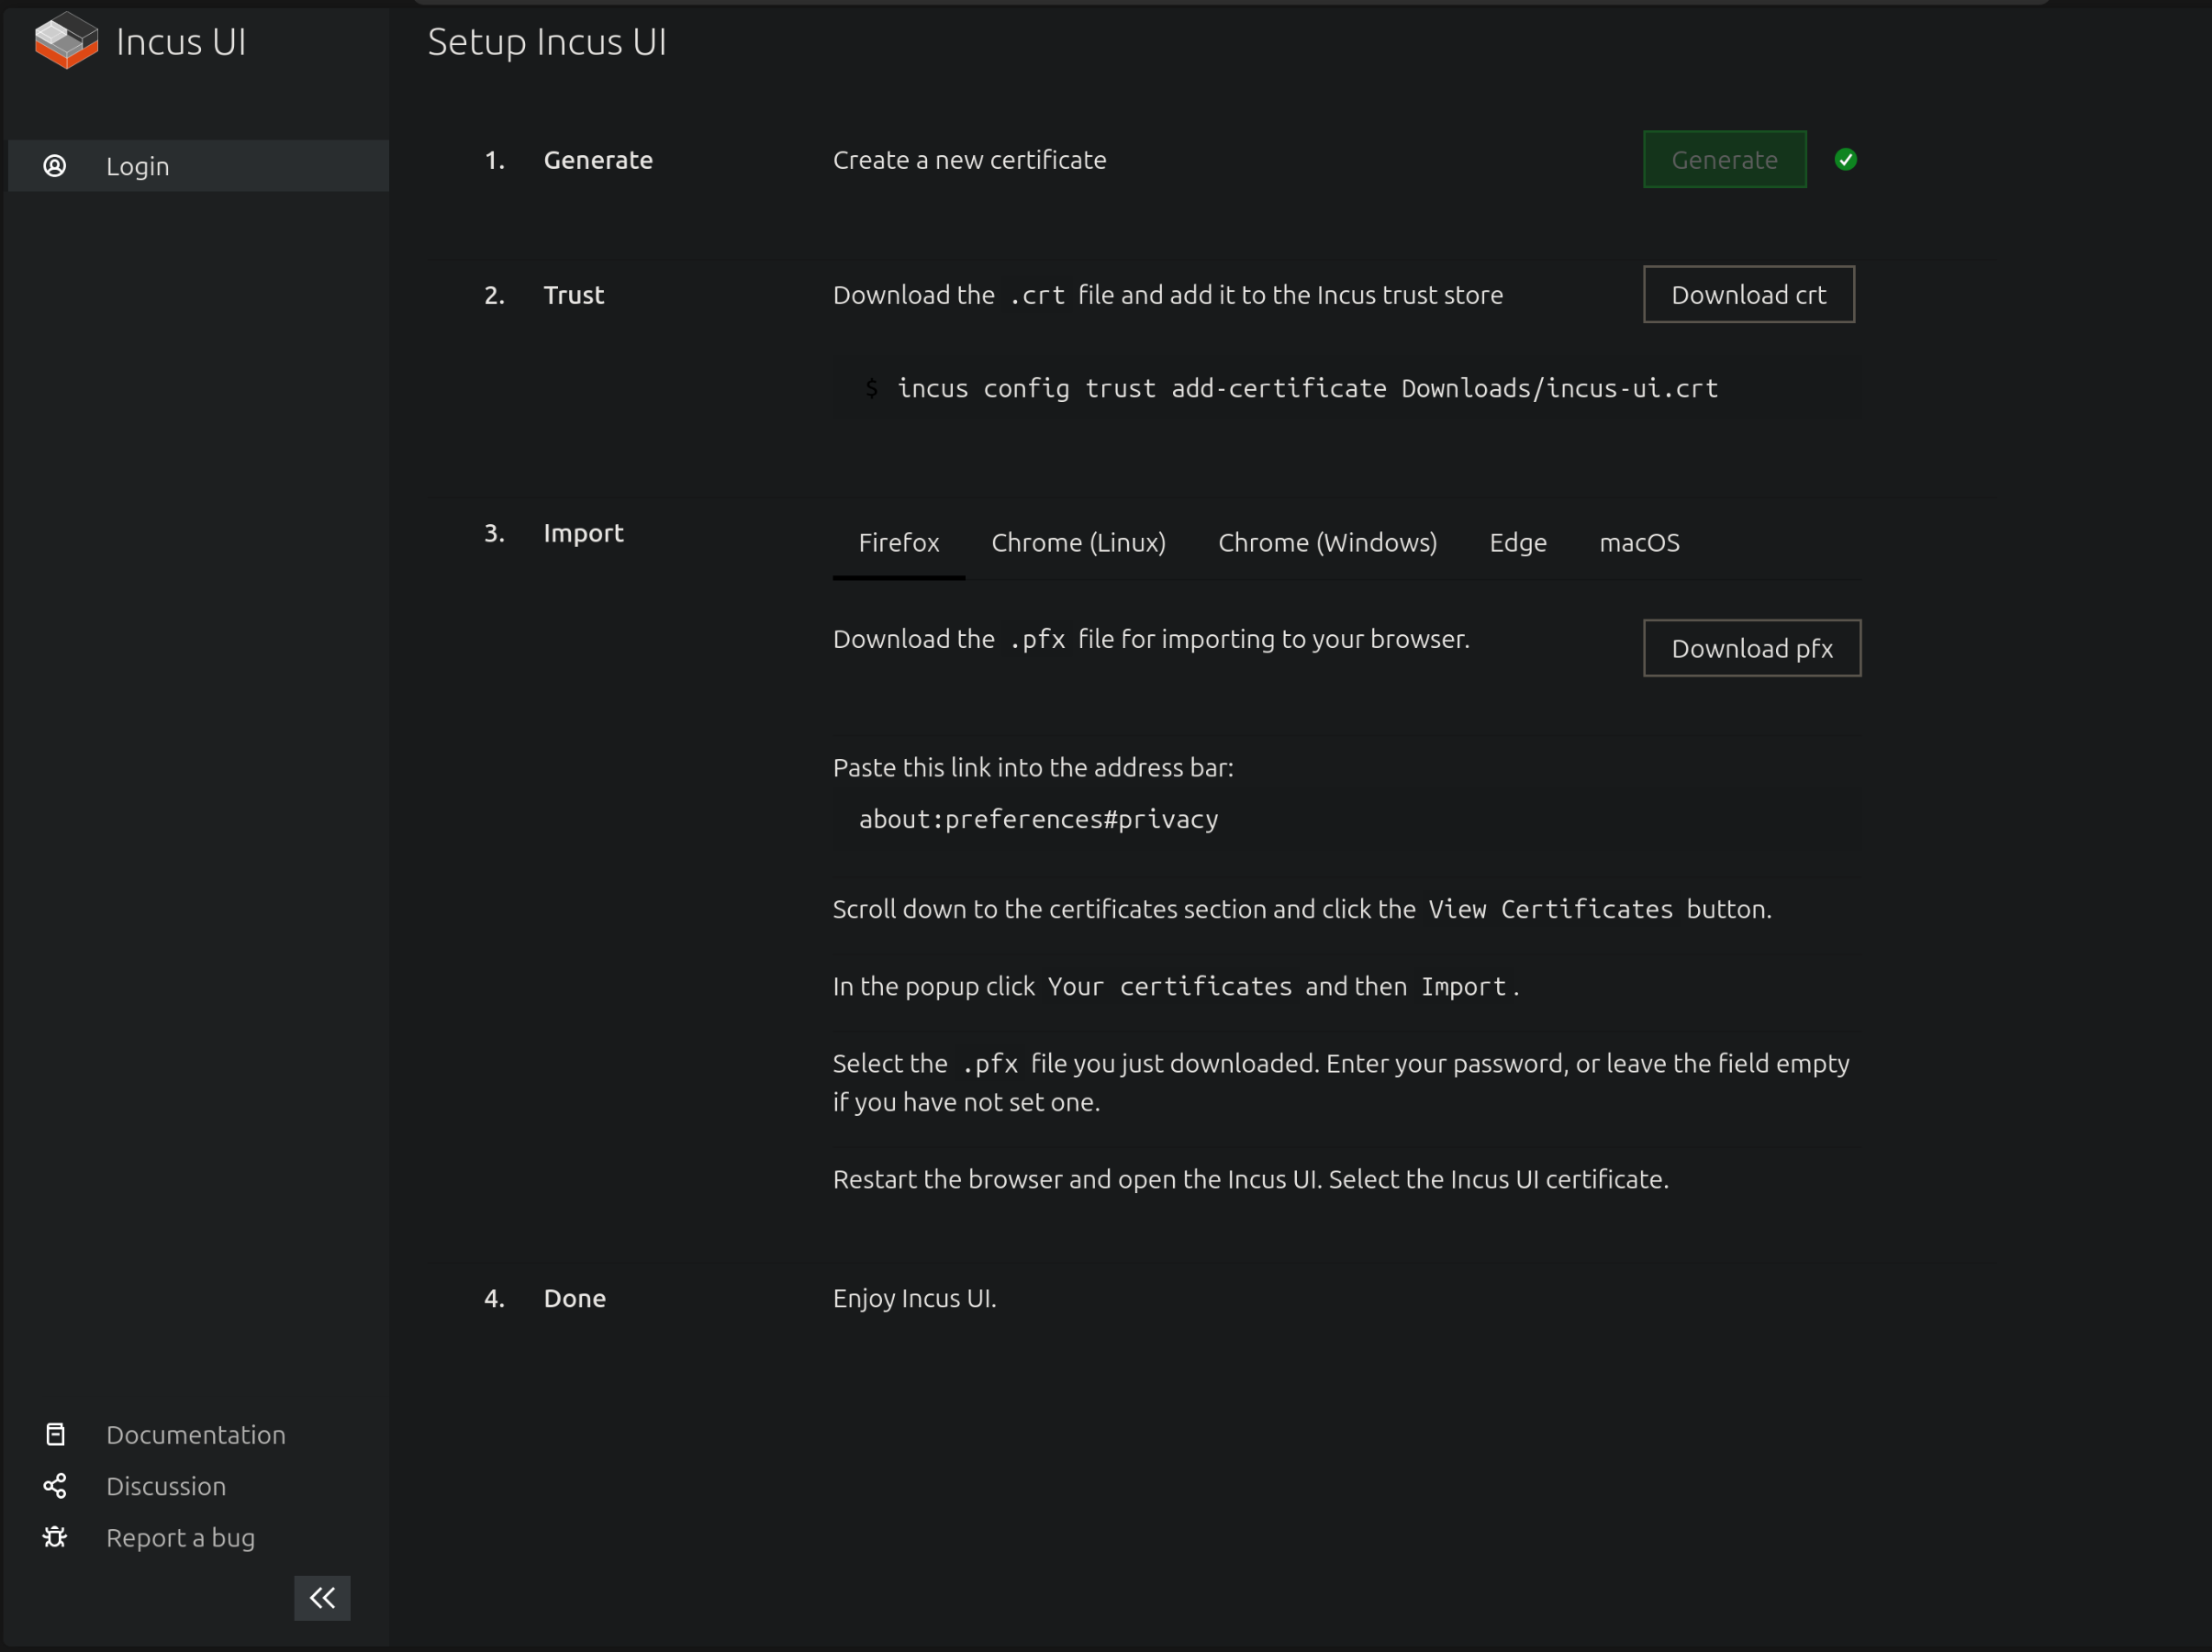
After restarting the browser, when you revisit the address, it’ll prompt you to select the certificate you added in the previous step. After that, you should have a web interface ready to create and manage VMs and LXCs.
Also exit out of the root user with the following command.
1
exit
Libvirt (the library used by any KVM program, such as Incus) also installs dnsmasq which runs on port 53, making it hard to run your own DNS server such as adguard or pi-hole. So I recommend to run these ad blockers on an LXC in KVM instead of Docker.